Styrofoam Printmaking Process
In preparation for Xylography and Linocut, our profesor decided to train us with Styrofoam first. It was a simple process, but some considerations must be taken into account first.

Step 2: Sketch a design (illustration or artwork) to print. If you write words, make sure they are mirrored.

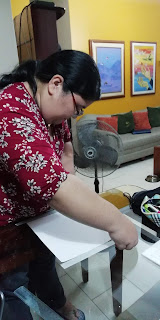
Step 3: Cut the Styrofoam into the size you need (A5 paper size). Remember the margins for the tape. Tape the drawing in place and trace it onto the Styrofoam plate.

Step 4: Create a register for the sheet you’re going to print. Use the tape to secure the Styrofoam plate to the working surface.
Step 5: Deposit and prepare ink in a tray. You can use 1 color, or 2 to create a gradient.

Step 6: Use the brayer or paint roller to spread the ink until you have an even coat. Once the brayer is coated with an even layer of ink, roll it over your Styrofoam plate.

Step 7: Position the paper on top of the Styrofoam plate and rub over the paper to help transfer the ink. Don’t leave it too long, or the paper will get stuck onto the plate. Carefully remove paper from the plate.


Step 8: Let the print dry and clean up workplace. Here's the final result!


Styrofoam Printmaking Process
Step 1: Gather necessary materials: Paper or cardboard, ink, brayer or paint roller, Styrofoam plate, tape, pen.
Step 2: Sketch a design (illustration or artwork) to print. If you write words, make sure they are mirrored.

Step 3: Cut the Styrofoam into the size you need (A5 paper size). Remember the margins for the tape. Tape the drawing in place and trace it onto the Styrofoam plate.

Step 4: Create a register for the sheet you’re going to print. Use the tape to secure the Styrofoam plate to the working surface.

Step 5: Deposit and prepare ink in a tray. You can use 1 color, or 2 to create a gradient.


Step 7: Position the paper on top of the Styrofoam plate and rub over the paper to help transfer the ink. Don’t leave it too long, or the paper will get stuck onto the plate. Carefully remove paper from the plate.


Step 8: Let the print dry and clean up workplace. Here's the final result!


Comments
Post a Comment